

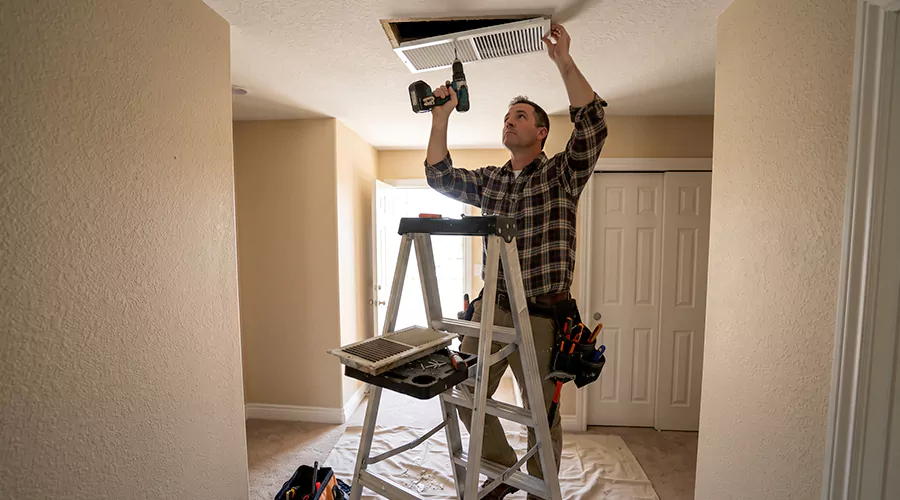
To replace a ceiling vent, turn off the HVAC system, measure the existing opening, remove the old grille or register, and install a correctly sized air vent replacement using suitable fasteners. Most straightforward ceiling vent cover replacements can be completed with a screwdriver and a stable ladder. However, replacing the metal duct boot above the ceiling or moving the vent to another location requires more involved HVAC work.
Ceiling vents distribute heated or cooled air into rooms through openings connected to the duct system. The visible part is usually a grille or register, while a metal box or fitting above the ceiling connects the opening to the ductwork. These components serve different purposes and should not be confused when planning replacement.
A ceiling vent cover may need replacement because it is rusted, bent, discolored, or difficult to adjust. In other cases, the cover is intact but the duct boot has separated from the ceiling or developed a leak. These problems cannot all be corrected by installing a new grille.
Choosing the right replacement requires measuring the actual duct opening and identifying whether it is a supply or return vent. Correct sizing helps the cover fit securely and maintain the intended airflow. Proper installation also avoids damaging the ceiling surface or disturbing duct connections above it.
What Is a Ceiling Vent?
A ceiling vent is an opening that allows air to enter or leave a room through the HVAC system. Supply vents deliver conditioned air, while return vents draw room air back toward the heating or cooling equipment. Both may be mounted in ceilings, depending on the home's duct layout.
A typical ceiling supply vent has a visible register, a metal boot above the ceiling, and a connected duct branch. Some registers contain adjustable louvers or an internal damper that controls airflow. Return grilles usually have a larger open area and may not contain a damper.
The visible cover can generally be replaced without changing the ductwork. The boot and connected duct are part of the HVAC distribution system and require a different repair procedure when damaged.
When Should You Replace a Ceiling Vent?
A ceiling vent cover may need replacement when it is physically damaged or no longer fits the opening properly. Rust and bent louvers can affect appearance and operation. Broken mounting points can also allow the grille to hang loosely or rattle whenever the blower runs.
Surface dust and ordinary discoloration do not always justify replacement. Many metal or plastic covers can be cleaned and reused. The decision should depend on the cover's condition and whether it continues to function correctly.
Common replacement reasons include:
- Rust has damaged the grille finish.
- The cover is bent or cracked.
- Adjustable louvers no longer move correctly.
- Mounting screws no longer hold the cover securely.
- The cover has gaps caused by incorrect sizing.
- A decorative upgrade is desired.
- The existing grille creates an unwanted noise.
- The cover has been damaged during ceiling renovation.
- The diffuser does not suit the room's intended airflow pattern.
- The connected ceiling boot is damaged and requires related work.
When the vent leaks around the ceiling opening, replacing the decorative cover may not correct the issue. The connection between the duct boot and ceiling surface should be examined separately.
What Is the Difference Between a Ceiling Register and a Ceiling Grille?
A register generally includes an adjustable damper or airflow-control mechanism. A grille provides a protective or decorative opening but may not contain a damper. The distinction matters when the original vent was designed to regulate or direct airflow.
| Component | Main Function | Typical Replacement Work |
|---|---|---|
| Supply register | Delivers and adjusts airflow | Replace removable cover |
| Return grille | Allows room air to enter return system | Replace removable grille |
| Ceiling diffuser | Distributes supply air in a particular pattern | Replace compatible diffuser |
| Duct boot | Connects duct to ceiling opening | HVAC repair or replacement |
| Flexible duct branch | Carries air to the boot | Duct repair or replacement |
| Balancing damper | Regulates airflow in the duct system | Qualified adjustment or repair |
A decorative cover with a different louver pattern may distribute air differently from the original. Changing from a directional register to a flat grille can affect comfort, particularly near exterior walls or large windows. The replacement should maintain a suitable airflow pattern.
How Do You Measure a Ceiling Vent for Replacement?
Ceiling vents should generally be measured by the size of the actual duct opening rather than the outside dimensions of the visible cover. A register sold as 6 by 10 inches commonly refers to an opening approximately six inches wide and ten inches long. The outer frame is usually larger so it overlaps the surrounding ceiling.
Remove the existing cover only after securing a safe working position. Measure the clear opening and record its width and length. If the opening or fitting is round, measure its diameter instead.
Check the screw-hole spacing and the size of the new cover's outside frame. A replacement must fit the opening and provide adequate overlap without interfering with ceiling trim. Its mounting method must also be compatible with the existing installation.
Common Ceiling Vent Sizes
| Nominal Opening Size | Common Application |
|---|---|
| 4 × 10 inches | Small rectangular supply register |
| 4 × 12 inches | Rectangular supply opening |
| 6 × 10 inches | Residential ceiling supply register |
| 6 × 12 inches | Larger rectangular supply opening |
| 8 × 8 inches | Square diffuser opening |
| 10 × 10 inches | Larger supply or return grille |
| Round sizes | Ceiling diffusers and selected supply outlets |
These sizes are examples, not a complete list of available products. Ceiling openings can also have custom dimensions. Always measure the actual installation rather than relying on a standard size chart.
What Tools Do You Need to Replace a Ceiling Vent?
A basic grille replacement usually requires only a few tools. The most important preparation is having a stable way to reach the opening while supporting the old and new covers. The correct fasteners should also be available before removing the existing grille.
| Tool or Material | Purpose |
|---|---|
| Tape measure | Measures duct opening |
| Screwdriver or suitable driver | Removes and installs fasteners |
| Stable ladder or step stool | Provides safe ceiling access |
| Vacuum with brush attachment | Removes accessible dust |
| Microfiber cloth | Cleans the surrounding ceiling |
| Compatible replacement grille | Covers the existing opening |
| Suitable screws | Secure replacement |
| Appropriate anchors when necessary | Repair damaged mounting points |
| Flashlight | Examines visible boot condition |
If the cover is connected to a spring-loaded mechanism, follow the manufacturer's removal instructions. Spring clips can move suddenly when released. The cover should be supported throughout removal to prevent it from falling.
How to Replace a Ceiling Vent Step by Step?
Replacing a removable ceiling register is a relatively straightforward project when the duct boot is sound and the opening remains unchanged. The steps below address an ordinary grille or register replacement. They do not involve cutting ductwork, relocating the opening, or changing HVAC airflow design.
Step 1. Turn Off the HVAC System
Switch off heating or cooling operation at the thermostat and wait for the blower to stop. This prevents air movement from disturbing loose dust while the register is removed. It also makes it easier to examine the ceiling opening.
A standard grille replacement does not normally require opening electrical equipment. If the vent contains powered controls or belongs to a specialized system, follow its manufacturer's instructions. Do not disconnect unfamiliar wiring as part of ordinary cover replacement.
Step 2. Prepare Safe Ceiling Access
Position a suitable ladder or stable step stool beneath the opening. The working surface should be level and free from nearby obstructions. Avoid standing on furniture or extending beyond the ladder's safe working position.
Have someone support the cover when it is large or heavy. Decorative metal return grilles can be more difficult to handle than lightweight plastic covers. The replacement should not begin if the cover cannot be removed safely.
Step 3. Remove Dust From the Cover
Vacuum loose dust from the visible grille before loosening the mounting screws. This reduces the amount of debris falling from the ceiling during removal. Use a soft attachment to avoid scratching the finish.
Do not spray water or cleaner directly into the opening. Moisture can reach insulation or surrounding drywall. Cleaning should remain limited to accessible surfaces.
Step 4. Support and Remove the Old Register
Hold the register securely while removing its mounting screws or releasing its approved fasteners. Some ceiling registers have screws on opposite sides, while certain diffusers use specialized retaining clips. The cover may release suddenly after the final fastener is removed.
Lower it carefully and place the screws somewhere safe. If paint has bonded the frame to the ceiling, gently separate the edge without tearing the drywall paper. Avoid pulling downward against the metal duct boot.
Step 5. Measure the Duct Opening
Measure the actual opening once the old cover has been removed. Record the width and length or round diameter. Check the available ceiling overlap and mounting points.
Compare the measurement with the replacement product's nominal size. The new cover should fit the opening without requiring duct modification. If the replacement is too small, an exposed gap may remain around the frame.
Do not cut the ceiling larger simply because a purchased register does not fit. Exchange it for a suitable size or have the opening evaluated when the dimensions are unusual.
Step 6. Inspect the Ceiling Boot
Use a flashlight to check the visible metal boot and surrounding ceiling material. Look for loose metal edges, separation from the ceiling, or signs of water damage. A sound boot should remain securely positioned when the cover is removed.
If the boot moves freely or appears disconnected from the duct, stop the simple replacement and arrange suitable repair. A new cover cannot fix a disconnected duct or damaged fitting. Replacing the grille without addressing that defect can leave the original airflow problem unresolved.
Step 7. Clean the Accessible Opening
Vacuum ordinary dry dust from the exposed edges and nearby surfaces. Avoid forcing the vacuum hose deep into a flexible duct. The task is to prepare the opening for the new cover, not to clean the entire concealed duct network.
If significant suspected mold or pest contamination is visible, avoid disturbing it with household tools. An appropriate assessment may be necessary. Ordinary household dust can generally be removed without additional service.
Step 8. Check the Boot-to-Ceiling Seal
Look for visible gaps between the metal boot and the surrounding ceiling. These openings can allow unwanted air movement between the room and an attic or ceiling cavity. The U.S. Department of Energy recommends appropriate sealing of register boots where they meet ceiling surfaces.
A small accessible gap may be suitable for compatible caulk or another approved sealing method. Larger openings may require backing materials or professional repair. The selected product must not obstruct the intended airflow passage or interfere with required fire-rated construction.
A homeowner should not attempt extensive ceiling work simply to install a new cover. If the boot is loose or the surrounding drywall is damaged, have the fitting repaired first.
Step 9. Position the Replacement Register
Place the new cover over the opening and align its mounting holes. Confirm that the frame overlaps the surrounding ceiling evenly. It should sit flat without requiring excessive pressure.
A directional supply register should be oriented to support the room's intended airflow pattern. If the original cover directed air toward a particular area, consider preserving that orientation. A return grille should remain unobstructed and appropriately sized.
Step 10. Secure the New Cover
Install the screws or approved mounting fasteners while supporting the register. Tighten them enough to hold the cover securely without bending its frame or crushing drywall. Check that the cover sits evenly against the ceiling.
If existing screw holes no longer hold properly, use an appropriate approved repair method. Longer screws should not be installed blindly because wiring or other building components may be nearby. A damaged boot or mounting structure may require professional repair.
Step 11. Adjust the Louvers
If the replacement register has adjustable louvers, check that they move freely. Set them in a suitable position for normal room airflow. Avoid closing several supply registers to compensate for an HVAC design issue.
The replacement should not introduce excessive noise or significantly restrict the opening. A decorative grille with very little free area may reduce airflow even when it fits physically. When changing the register type, confirm that it is appropriate for the room.
Step 12. Restore HVAC Operation
Turn the system back on and observe the new register. Check that it remains secure without rattling. Air should discharge or return normally through the opening.
If airflow is noticeably weaker than before, check whether the replacement's damper is partly closed or its louvers are restrictive. Persistent problems may indicate that the register type is unsuitable or that the duct system needs separate attention.
How Do You Replace a Round Ceiling Diffuser?
Round ceiling diffusers are common in some heating and cooling installations. They often connect to a round duct or diffuser box rather than a rectangular boot. Their removal method may involve screws, clips, or a twist-lock design.
Identify the model or fastening arrangement before attempting removal. Measure the actual round opening and check the required mounting configuration. Some diffusers have adjustable center cones or other parts that influence the airflow pattern.
A replacement should be selected for the correct duct size and application. Not every round cover is interchangeable. A decorative exhaust grille should not be substituted for a designed supply diffuser without confirming its suitability.
Can You Replace a Ceiling Supply Vent With a Return Vent?
A supply vent and a return vent are not interchangeable parts of the HVAC layout. Their function depends on the ductwork connected behind the opening. Changing the visible cover does not convert a supply branch into a return pathway.
A supply register may include directional louvers that help distribute conditioned air. A return grille is designed to admit room air with suitable open area. Each should be selected according to its intended function.
Converting an actual supply opening into a return requires duct modifications and an airflow design review. It is not a simple ceiling vent cover replacement. A qualified HVAC contractor should evaluate such changes.
How Do You Replace a Damaged Ceiling Duct Boot?
Replacing a duct boot is more involved than changing a register cover. The boot connects the visible ceiling opening to the concealed supply or return duct. If it is rusted or disconnected, the attached duct may need to be accessed from the attic or through an appropriate ceiling opening.
A qualified technician should secure the new boot to suitable framing or other approved supports. The duct connection must be mechanically fastened and sealed, and the boot-to-ceiling joint should also be sealed as appropriate. Insulation disturbed during installation should be restored.
If the surrounding drywall has become damaged, additional repair may be needed. A replacement grille should not be used to hide a loose duct boot or unsupported ceiling opening.
Can You Move a Ceiling Vent to Another Location?
Yes, but relocating a ceiling vent requires changing the connected ductwork. The installer must determine a suitable new position and route the duct without creating unnecessary airflow resistance. The old opening also needs proper closure and ceiling restoration.
Moving a vent may affect air distribution in the room. A supply outlet near an exterior wall or window may serve a different purpose from one in the center of the ceiling. The new position should follow the heating and cooling design rather than aesthetics alone.
A relocation project can require permits, duct modifications, and drywall work. It should be estimated separately from replacing a removable cover.
How Much Does Ceiling Vent Replacement Cost?
A standard AC register commonly costs around $12 to $22 for the component according to 2026 Angi pricing. More decorative materials can cost substantially more, with some specialty registers approaching $200. Hiring a professional for a basic replacement may bring the total into approximately $100 to $300 under published register-replacement estimates.
| Ceiling Vent Work | Indicative U.S. Cost |
|---|---|
| Basic standard register, part only | $12–$22 |
| Decorative or specialty register, part only | Up to $200 or more for selected designs |
| Professional basic grille replacement | $100–$300 |
| Duct boot repair or replacement | $100–$350 in some estimates |
| Relocating a ceiling vent | Requires a separate ductwork and ceiling repair quote |
These prices represent different types of work. Replacing a visible grille yourself may cost only the new component and minor supplies. Repairing a duct boot or moving a vent involves more labor and may require ceiling access.
Professional costs can also reflect a minimum service call. Replacing several accessible grilles during one visit may reduce the average labor cost per opening, depending on the contractor.
What Mistakes Should You Avoid When Replacing Ceiling Vents?
A ceiling vent replacement can create problems when the new cover does not match the opening or intended airflow pattern. A poorly secured grille may rattle or fall. Changing the vent type without considering the HVAC system can also reduce airflow.
Avoid these mistakes:
- Measuring only the outside dimensions of the old grille.
- Purchasing a cover with the wrong nominal opening size.
- Removing a large ceiling grille without supporting it.
- Overtightening screws into fragile drywall.
- Ignoring a loose or disconnected duct boot.
- Blocking airflow with an unsuitable decorative cover.
- Spraying liquid cleaners into the duct opening.
- Disturbing unfamiliar insulation above the ceiling.
- Cutting a new opening without checking nearby wiring.
- Relocating a vent without evaluating the duct route.
A new grille should improve the appearance or function of the opening without creating a new airflow problem. If the installation requires structural or duct modifications, qualified assistance is preferable.
When Should You Hire a Professional?
A homeowner can usually replace an ordinary removable ceiling cover when access is safe and the opening remains unchanged. Professional help becomes appropriate when the duct boot is damaged or the replacement involves a new location. Ceiling damage and unusual mounting arrangements can also justify assistance.
A qualified HVAC technician can inspect the connection and determine whether the duct is properly supported and sealed. When a vent is being relocated, the contractor should check the airflow requirements. The completed work should restore the ceiling opening and duct connection appropriately.
Conclusion
Replacing ceiling vents is usually straightforward when only the removable grille or register is damaged. Accurate measurements and suitable fasteners help the new cover fit securely. The connected duct boot should be inspected because a loose or leaking fitting requires additional repair. Moving an outlet or changing its function involves ductwork modifications, not just a new cover. Before buying a replacement, measure the opening and determine whether the problem involves the grille or the concealed connection.